4. Publish a new service
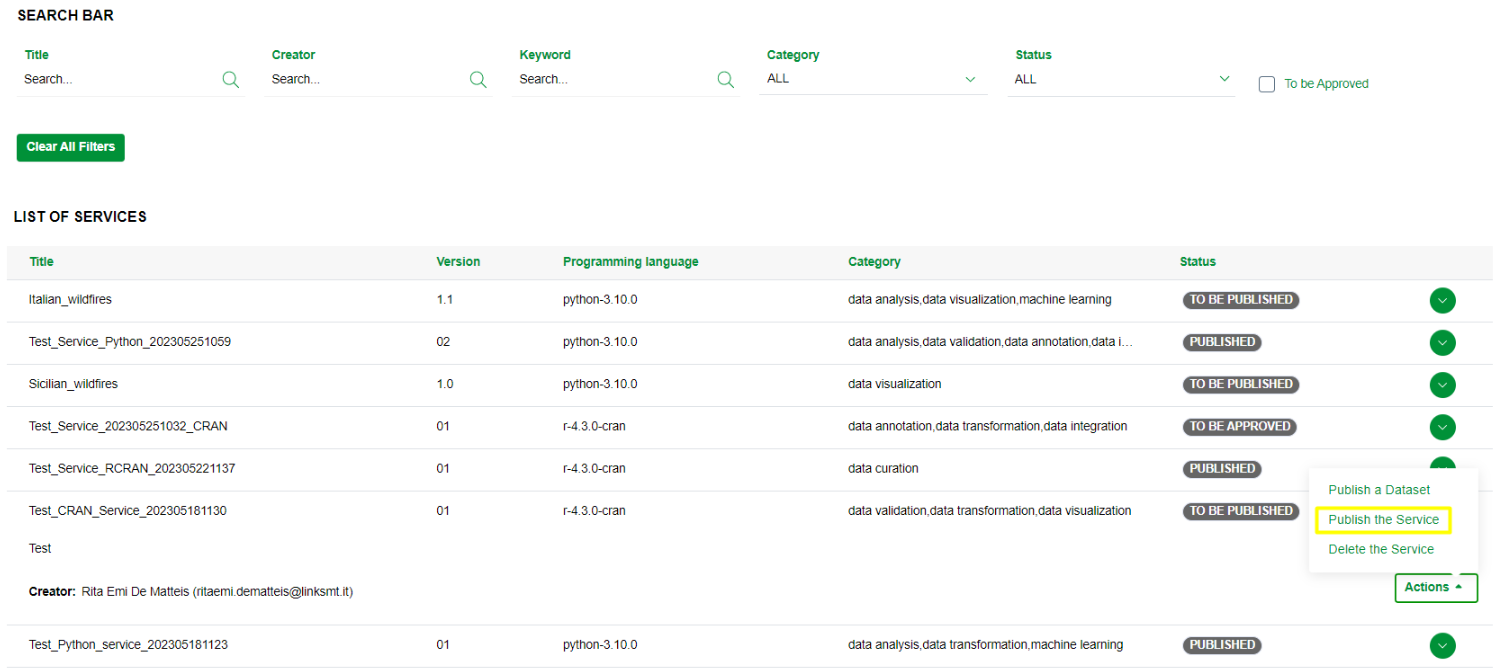
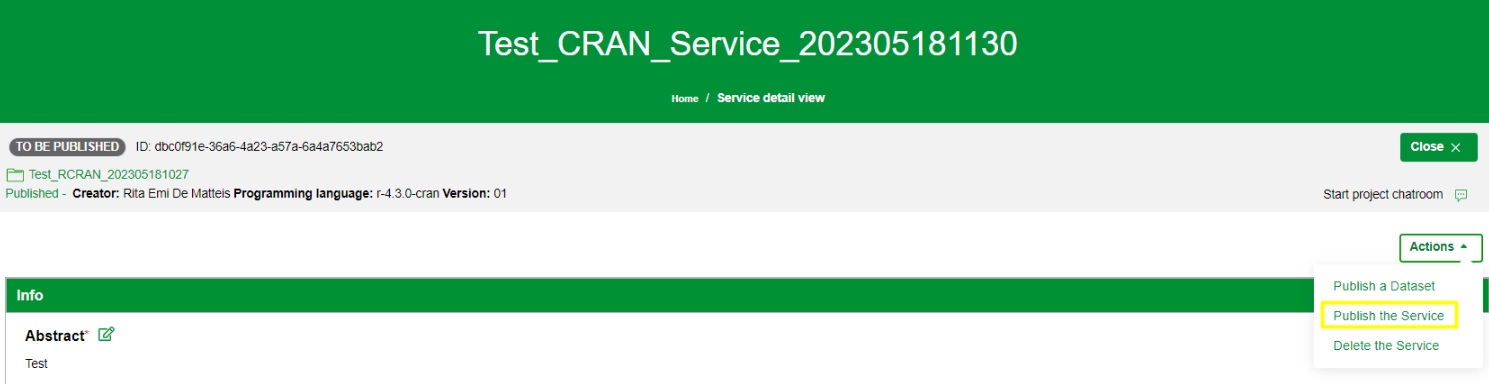
The application gives the Project creator the possibility to publish a service within the DataLabs Catalogue and the Metadata Catalogue, when the component will be integrated. This functionality is available both from the List of Services and from the Service Detail view. To publish a service, you need to:
- click on Publish the Service item in the Actions menu in the List of Services or in the Service details view as shown in the images below:
- the stepper located below the project information bar

- a description section (if foreseen)

- and the contents section that changed depending on the step
Such wizard is also structured in five steps:
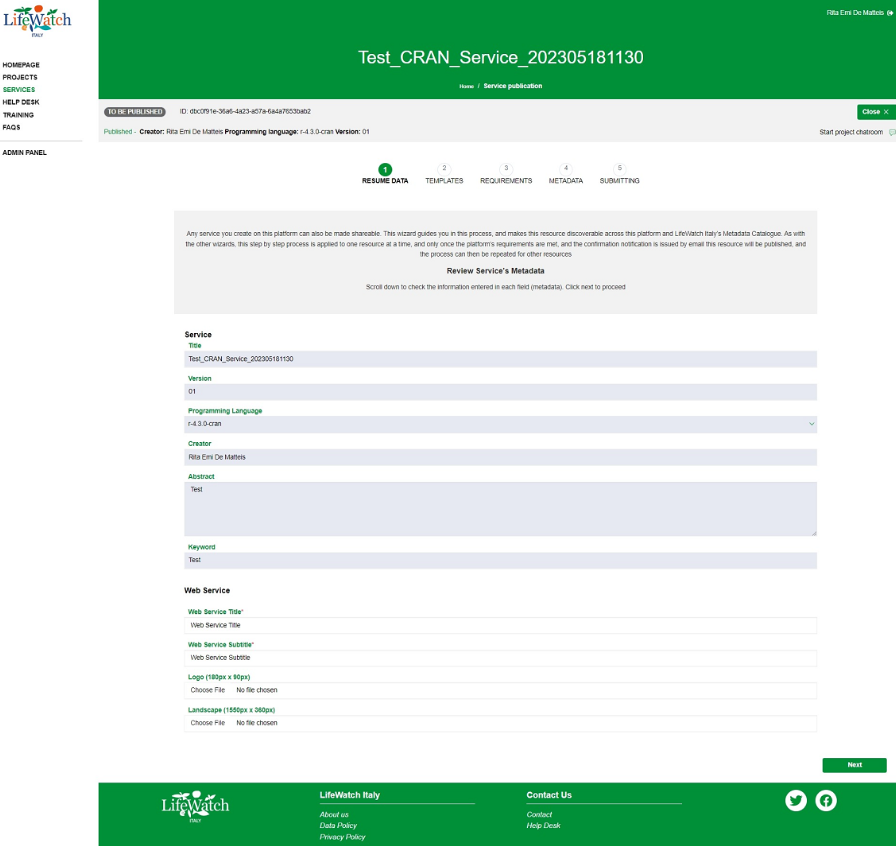
- in the first step there are:
- a summary of the main fields related to the service. Please note that the information is not editable, to edit some fields you have to go back to the project detail view through the “x” icon that you find in the project information bar
- the fields related to the Web Service, that are:
- Web Service Title (mandatory)
- Web Service SubTitle (mandatory)
- Logo
- Landscape
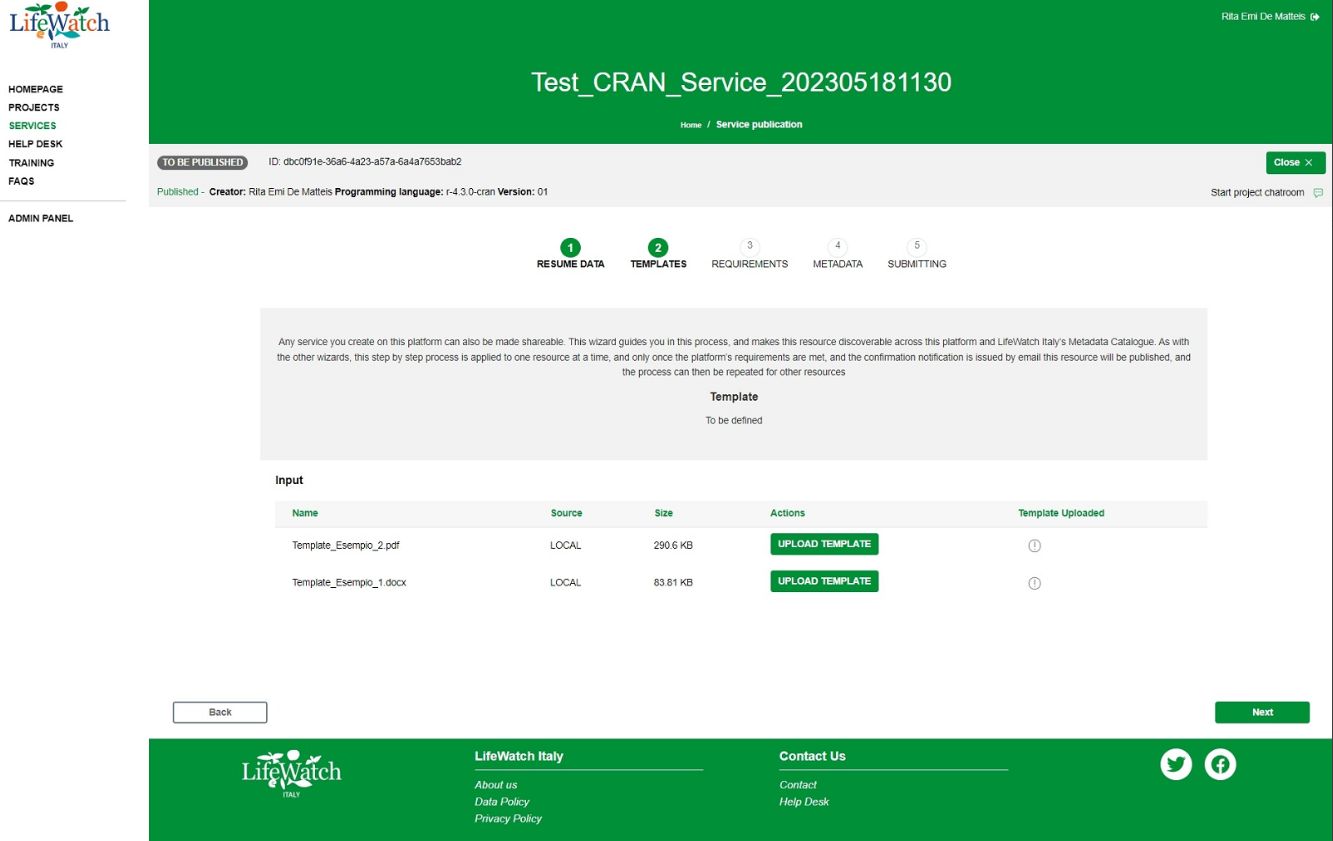
- the second step is related to the template(s) upload; in this step you have to upload a template for each input file uploaded from Local source.
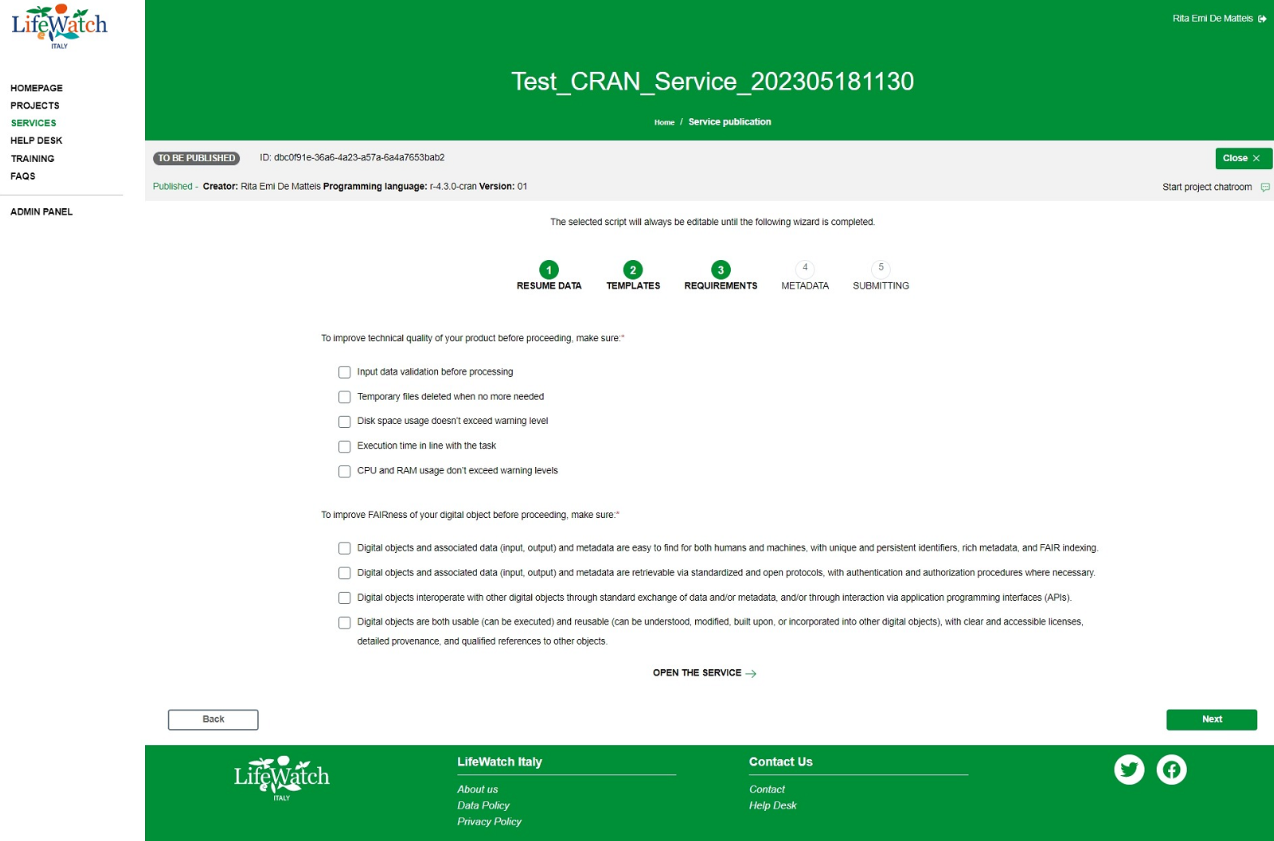
- In the third step there is a list of best practices and guidelines you need to make sure you have followed and adopted. If you have not followed one or more of the items listed, you can return to the project by clicking on Open the service at the end of the checklist; if you have applied and confirmed all the items listed, you can click on Next to proceed.
- in the fourth step you have to fill in all the mandatory fields and click on Request for publishing button to proceed with the request of publication in the Metadata Catalogue
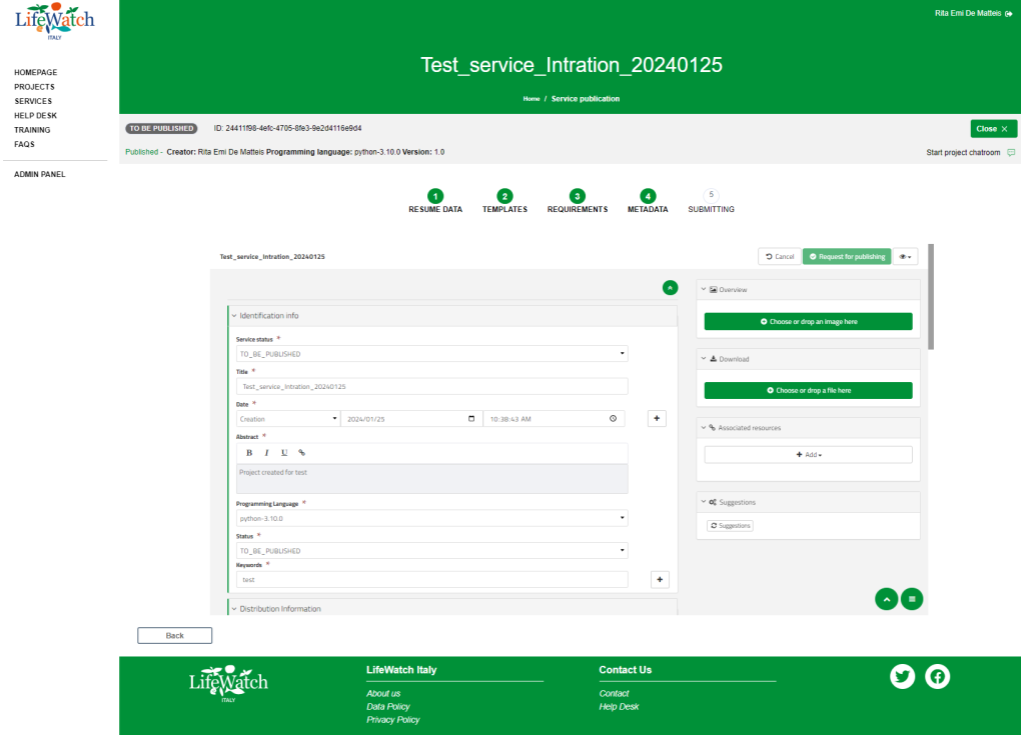
Please note: you need to have specific permissions in the Metadata Catalogue to be able to correctly perform this step.
- the fifth and final step confirms that the publication request has been successfully completed.
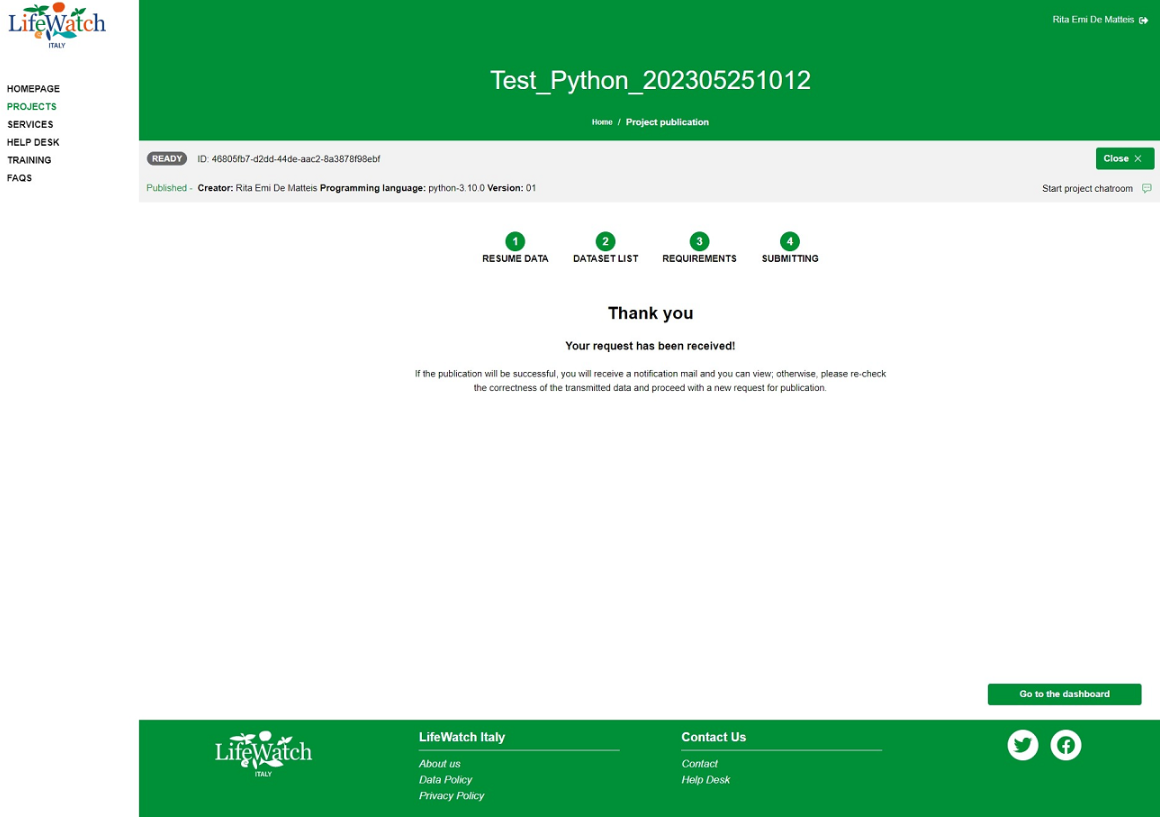
Please not: at the end of the publication process, you will receive an email notification confirming or not the publication.
A published service will be visible to all the users authenticated and not. Different information and actions will be made public depending on whether the user is authenticated or not. In particular, a guest user can see information about a public service by clicking on the appropriate service record within the Homepage or within the List of Services.
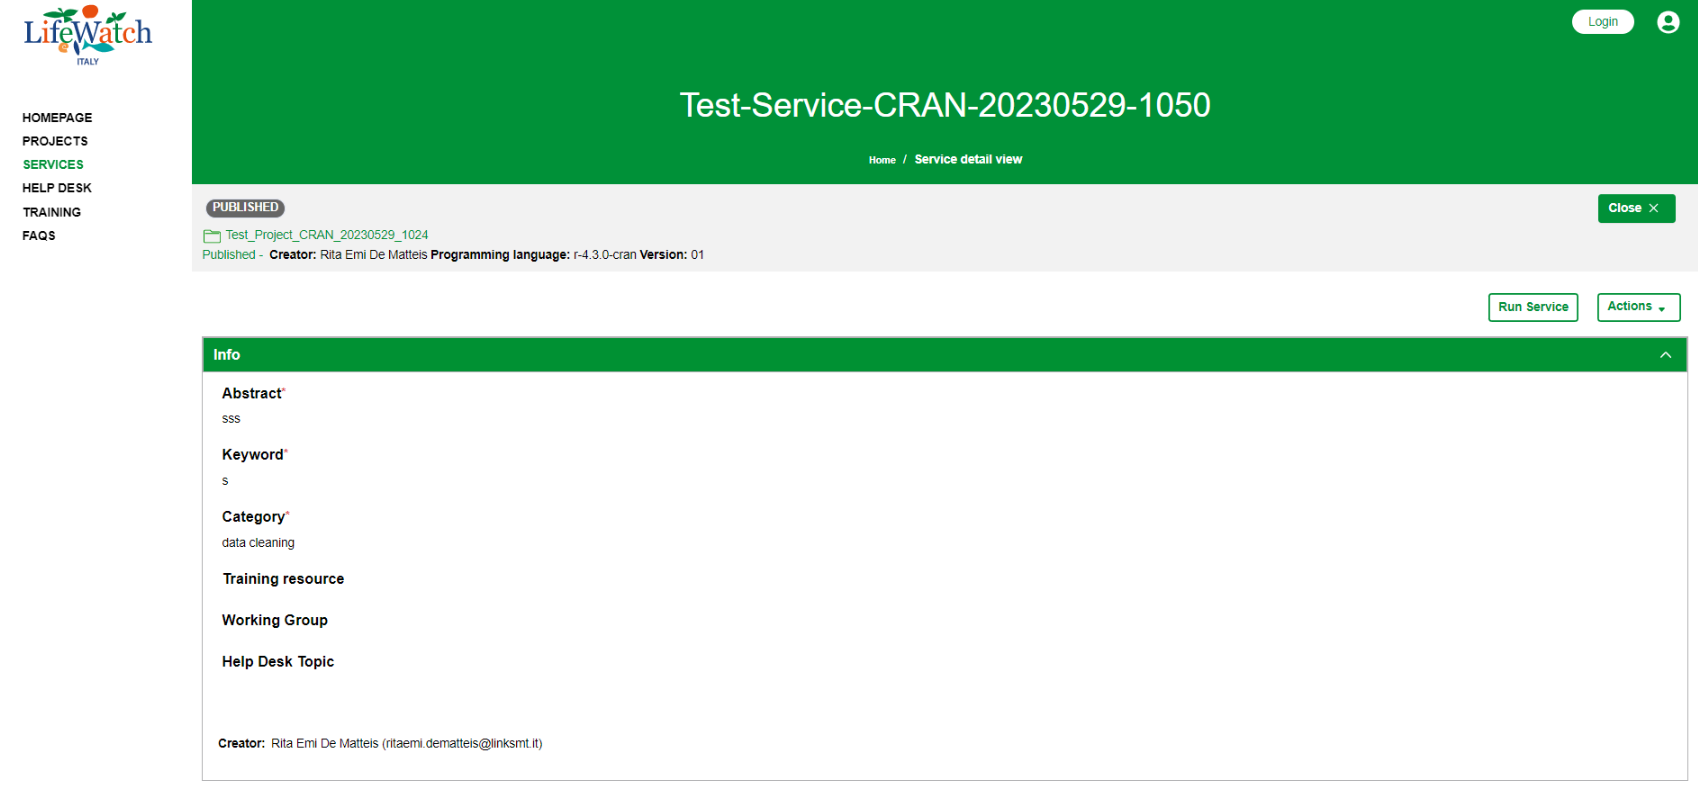
Then, the service detail view will be shown with a minimum set of information which are:
- the Service information bar with:
- Title: field that identifies the name assigned to the service
- Creator: field that identifies the name of the user who created the service
- Programming Language: field that identifies the programming languages in which the service was implemented
- Version: field that identifies the version of the service
- the Info section with:
- Abstract: field that contains a brief description with the main characteristics of the service
- Keyword: field that contains word(s) describing the service
- Category: field that identifies the categories associated to the service
- Training room: field that could contain a web link to a specific section defined externally to the platform and accessible within the LifeWatch Training platform
- Working Group: field that could contain a web link to a section that the Project creator has previously created within the LifeWatch Community
- Help Desk topic: field that could contain a web link to a specific section defined externally to the platform and accessible within the Help Desk platform
A guest user can:
- run the service in a Web Service mode
- download a zip file about the selected service
An authenticated user can also:
- view all the information
- launch a new execution
Further details are described in the relevant sections.